2 Beginner Friendly Backbending Exercises
The purpose of this article is to explore two introductory exercises for those interested in getting started with back-bending.
When it comes to the world of backbends, it's much more than just bridges. There are extraordinary back bends seen across dance, hand balance, gymnastics, contortion, and many other disciplines. They're epic, beautiful, and phenomenal displays of flexibility. However, most of those backbends are not basic positions. They're much too advanced for entry into backbends. We must first develop a foundational understanding of how to actually bend our backs as well as allow enough time to go by for adaptations to occur. Extending the spine is not the most natural movement for humans to do.
This article aims to provide a guide along with two exercises that are a great starting point for beginners to learn how to arch the spine and pull us into the backbend positions we desire to achieve. In order to reach our maximum backbend potential, we need two things. Awareness of how to access the thoracic spine and sufficient strength in the back muscles to pull us into the backbends. The two exercises are the backbend over support and active cobra.
1) Backbend Over Support
In order to extend the spine to its highest degree, each vertebra of the spine needs to have some ability to move and provide space for a maximum extension to happen. This is a challenge however because most people experience a thoracic spine that is significantly less flexible than their lumbar spine. This is very common, but nothing to worry about. Just like the mind, the body can be educated over time to improve its ability to extend its thoracic spine.
The backbend over support is by far my favorite backbend exercise for isolating the extension of the thoracic spine. I learned this one along with the approach I cover below from Emmet Louis at his M3 workshop in Sweden earlier this year. Not only is it fantastic for those new to back bending, but it also has much use for those with advanced levels of back flexibility. How the practitioner performs the exercise is usually what differs between the levels of flexibility.
This article will cover a specific approach to accessing the t-spine. First, let's review the setup, and then we'll cover the details.
Setup
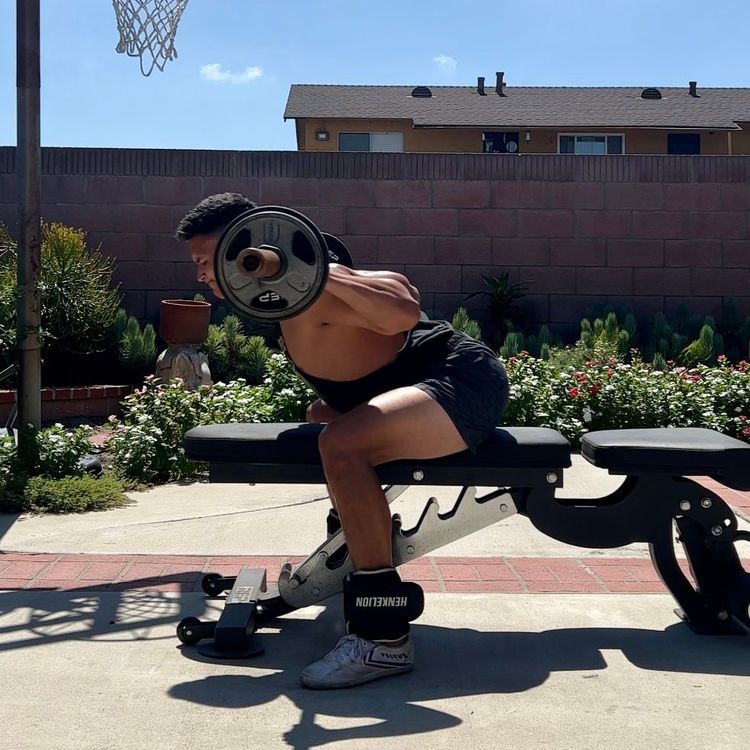
1) Support - Keep it simple here. A bench or box works great.
2) Arms - To get the most out of the movement, the arms should be locked overhead. They can be placed against a wall. They can be safely held down by a partner. Another great option is setting up in front of a squat rack with a loaded barbell and holding onto the barbell. Just make sure it's loaded heavily enough not to move.
The main detail with the arms is that they should feel comfortable while overhead. We're working our t-spine, not our shoulder flexion. If you feel restrictions or discomfort in the shoulder, there 2 things that can be done. One is to limit shoulder flexion by either raising the hands higher on the wall or placing the barbell one pin higher on the rack. And two, the elbows can be set up in a bent position overhead by grabbing the sides/underneath the box or bench.
Lastly, a light dumbbell can be used to hold the hands in place but a fixed surface or object is preferable.
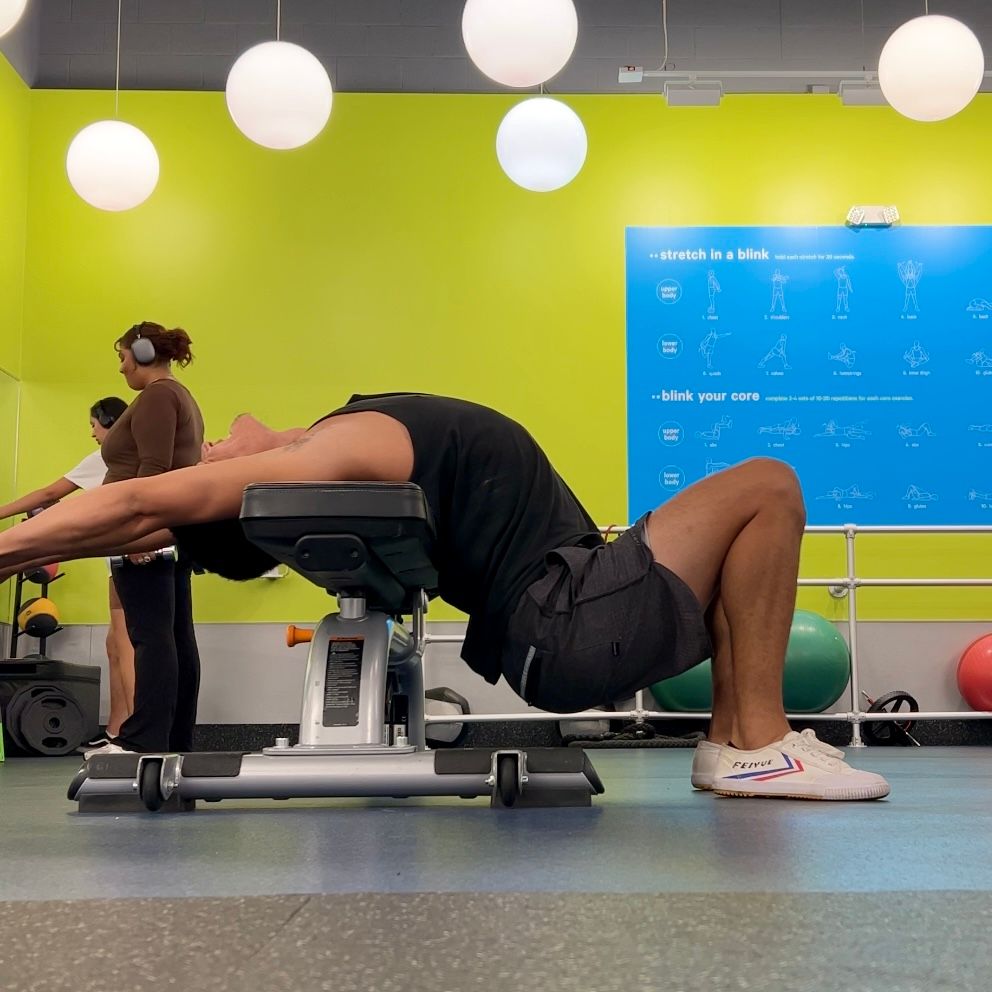
3) Back Position on Support - The key here is to set up on the edge of the box with your upper back in contact with the support. Near the bottom of the shoulder blades. Setting up lower on the spine will allow more bend to happen but it will come out of the lumbar spine as opposed to the more challenging t-spine.
As you get familiar with the exercise, explore moving slightly up and down. Learning how to access the different vertebrae in the t-spine.
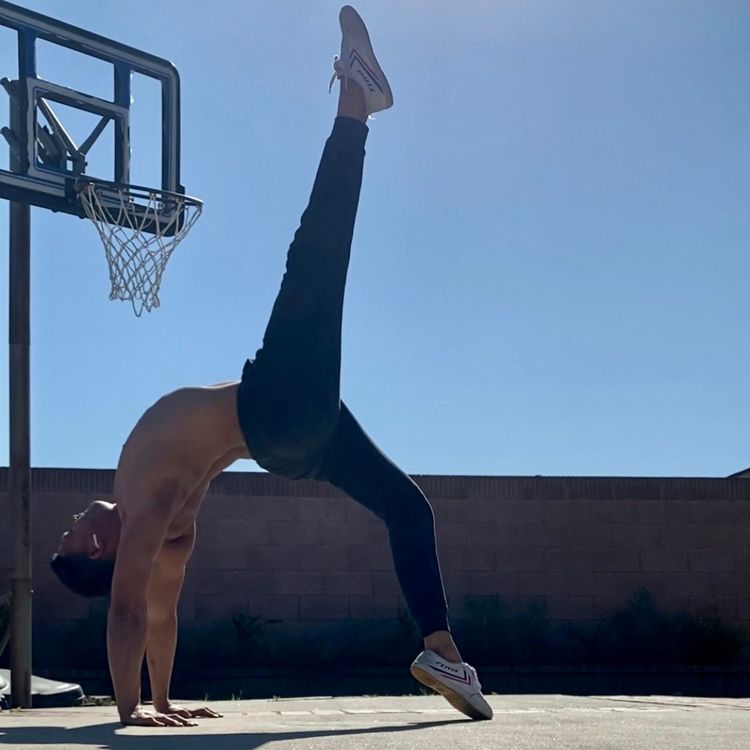
4) Feet Distance from Support - Where the feet start in relation to the support is somewhat dependent on flexibility. At first, it may be okay to start with the feet just in front of the knees. You can see how I set up this way in the picture below on the right. However, this foot position can change. In the section below called "approach", there will be a cue for the hips to move down and back as we get deeper in the position. If the feet are too far from the support, it will limit how much we can drive the hips back and limit the amount of extension we can get. So as your range increases, take note of also moving your feet closer to the support.
Approach
Our approach is going to utilize longer, slightly more passive holds rather than intense isometric contractions. The goal is to learn how to use our breath in conjunction with the expansion of our rib cage to facilitate the extension we're looking for.
- First, drop the hips down to a depth that's relatively comfortable. Be sure not to drop into an intense depth from the get-go.
- From here, take a deep breath in, taking note of how the rib cage expands outward during the inhalation. I encourage you to become very familiar with this expansion as it's important for getting into the t-spine. Take a few more deep breaths and feel the expansion a few more times.
- Then with a controlled exhale, drop the hips down further and towards the support. Make sure to not only drive the hips down. They must move down and back towards the support to create the intention of moving into more of an arch.
- Try to find some comfort in the new deeper position and repeat the breathing and deepening process for a total of 3-4 rounds or a total of 90s.
- You can also experiment with getting deeper into the stretch while the rib cage is expanded. This one feels a bit strange at first, but I find it useful from time to time as I move along the vertebrae of the t-spine.
Programming - 3 sets of 90s
2) Active Cobra
The active cobra is a foundational movement in the world of backbends and a staple across many athletes' training regimes. Just like the backbend over support, it can be trained at all levels of backbend ability and still deliver quality results. Aside from the cobra being great for all levels of flexibility, it's also great for a wide array of spines. Whether you have a bendy spine or a not-so-bendy spine, there's an active cobra variation suited for you. The active cobra even has a place for contortion levels of flexibility.
Upon first glimpse, it may look rather simple and undaunting. But it's actually a very challenging and demanding position. The goal of the cobra is to learn how to actively extend and articulate the spine into an arch using minimal assistance by isometrically contracting as many of the muscles of the back as possible. Extending the lumbar and t-spine through the brute strength of your back muscles is wickedly intense! So keep in mind from this point forward that a quality active cobra training session will be guaranteed to be difficult.
Setup
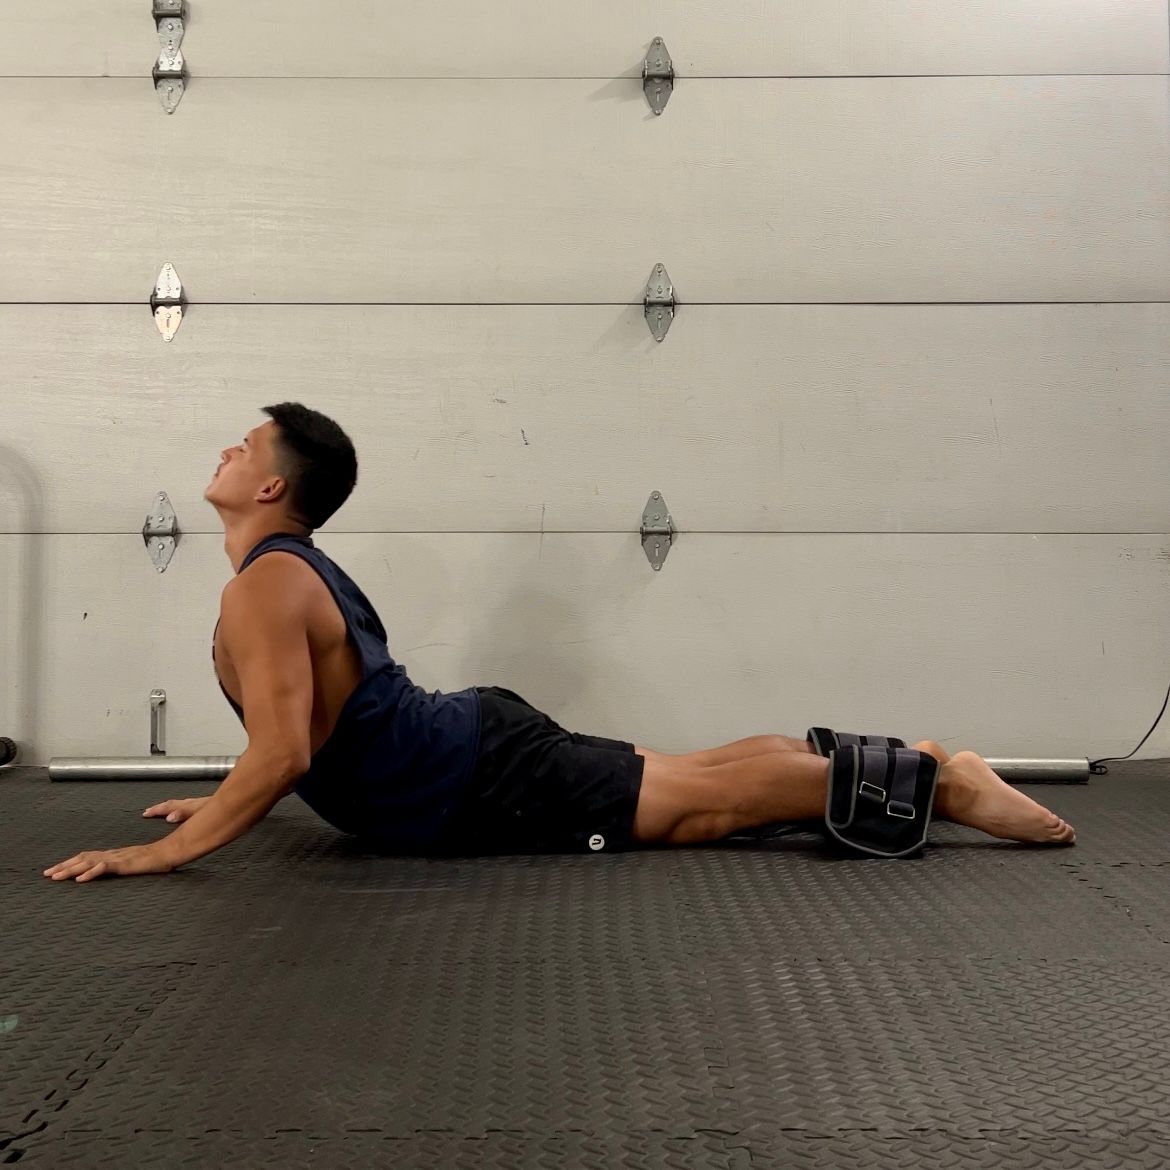
1) Foot Anchor
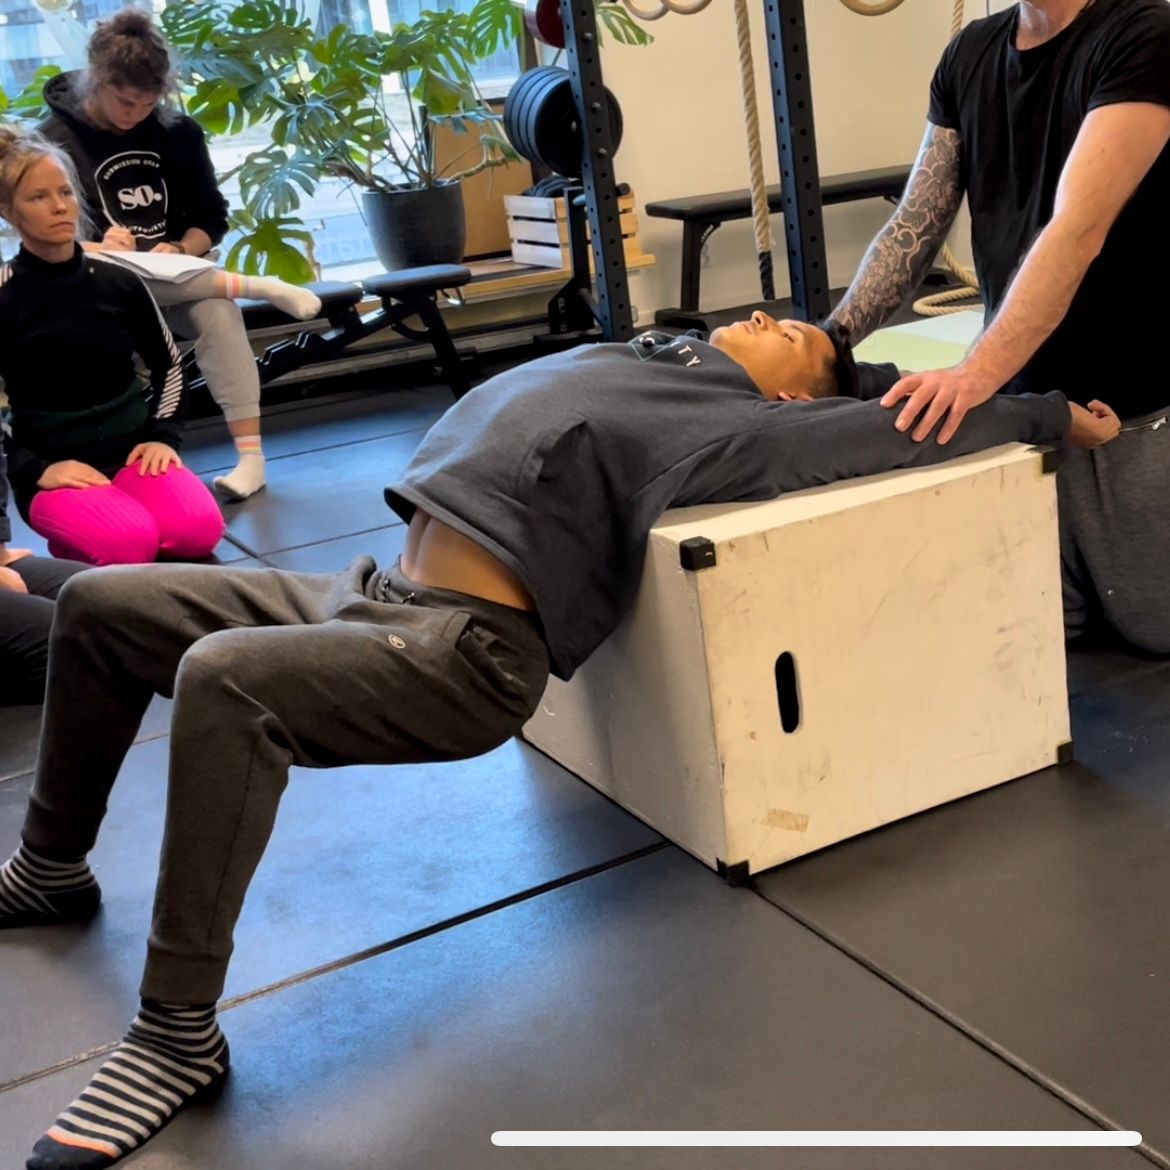
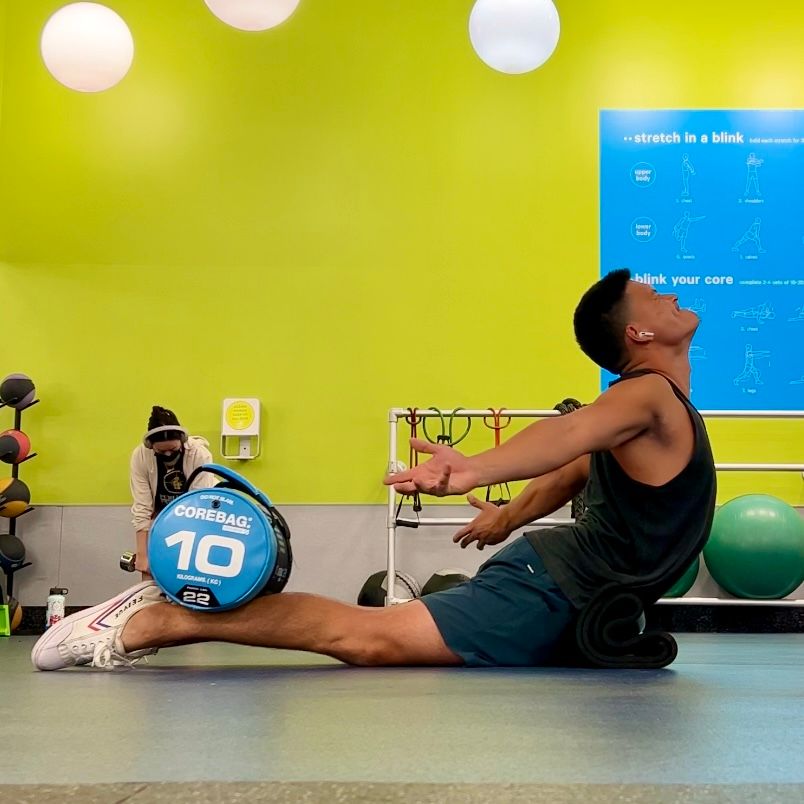
The first key setup detail is to place a weight behind the legs towards the feet. Placing a weight on the feet acts as an anchor to keep the legs pressed against the ground as we begin to extend the spine. You can see two different anchors in each of the pictures above and below. Feel free to get creative with what you use as an anchor. A few ideas are ankle weights, sandbags, plates on top of the feet, the bottom of a couch, or even a partner holding the feet down.
Not using some load to anchor the feet is actually a setup mistake. Using no anchor is an advanced cobra variation that will come once we develop experience with the foundational cobra progressions. The foundational cobra position is hands on the ground. The picture below is an advanced variation shown only to demonstrate another anchor option.
2) Posterior Pelvic Tilt
The second key setup detail is to lock into a very strong posterior pelvic tilt (PPT) at the start of the movement and maintain it throughout. Not having a strongly locked PPT does two things. It can limit the amount of arch you're capable of getting into, as well as increase the demand in the lumbar spine.
This seems like a simple thing but it's common for practitioners not to use as much PPT as they are capable of getting into. The required glute contraction to do this is intense. Don't fear this glute contraction. It's necessary for deep bends.
Approach
When it comes to extending the spine and creating a deep arch, there's a key concept that we want to keep in mind. It's the idea of always trying to bend at each point along the spine, maximizing our arch. We do this through lengthening, articulating, and expanding our spine. It's not as simple as just extending the spine backward. There are several nuances to extending the spine and the approach below sums it up.
- Firstly, lead with the head and eyes. This will immediately encourage more bend in the t-spine as opposed to dumping the load on the lumbar spine.
- Once you reach a point that feels challenging, think of pushing the chest slightly forward and elongating the spine as a way to create more space between the vertebrae of the t-spine. It's not just the back of the body doing work. The front of the body also plays a role. Driving the front of the body forward will encourage more bend.
- From here, you can begin to ramp up the contraction of your back muscles, trying to feel the contractions happening across each of your vertebrae. This may allow even more extension to occur before trying to push into a deeper arch.
- Then, continue to look further backward and again expand the front of the body outward, and try to access just a bit more extension in these final few seconds.
Progressions
1) Hand Assist
While the cobra is designed to be an active isometric contraction with minimal assistance, it can be a challenge at first to lift the torso without some assistance. So the first progression of the cobra begins with the hands placed on the floor. At first, use your hands as much as needed to begin to create the spinal arch. Just be sure not to rest your weight on your hands. This would be a big mistake as the cobra will become more passive and we won't develop the isometric strength we're looking for.
Just like there are levels to the cobra, even the hand-assisted cobra has levels. The first level is hand assisted with bent arms. You can see this in the first picture of the cobra section. It can be beneficial for some to start with bent arms in order to learn how to articulate the entire spine and not dump the stretch into the lumbar as well as for those with more limited spinal extension.
The second level is hand assisted with straight arms. As your range of motion and ability to contract your back muscles improves, begin to try to extend the arms even further until they are straight. Move the hands further back to increase the extension.
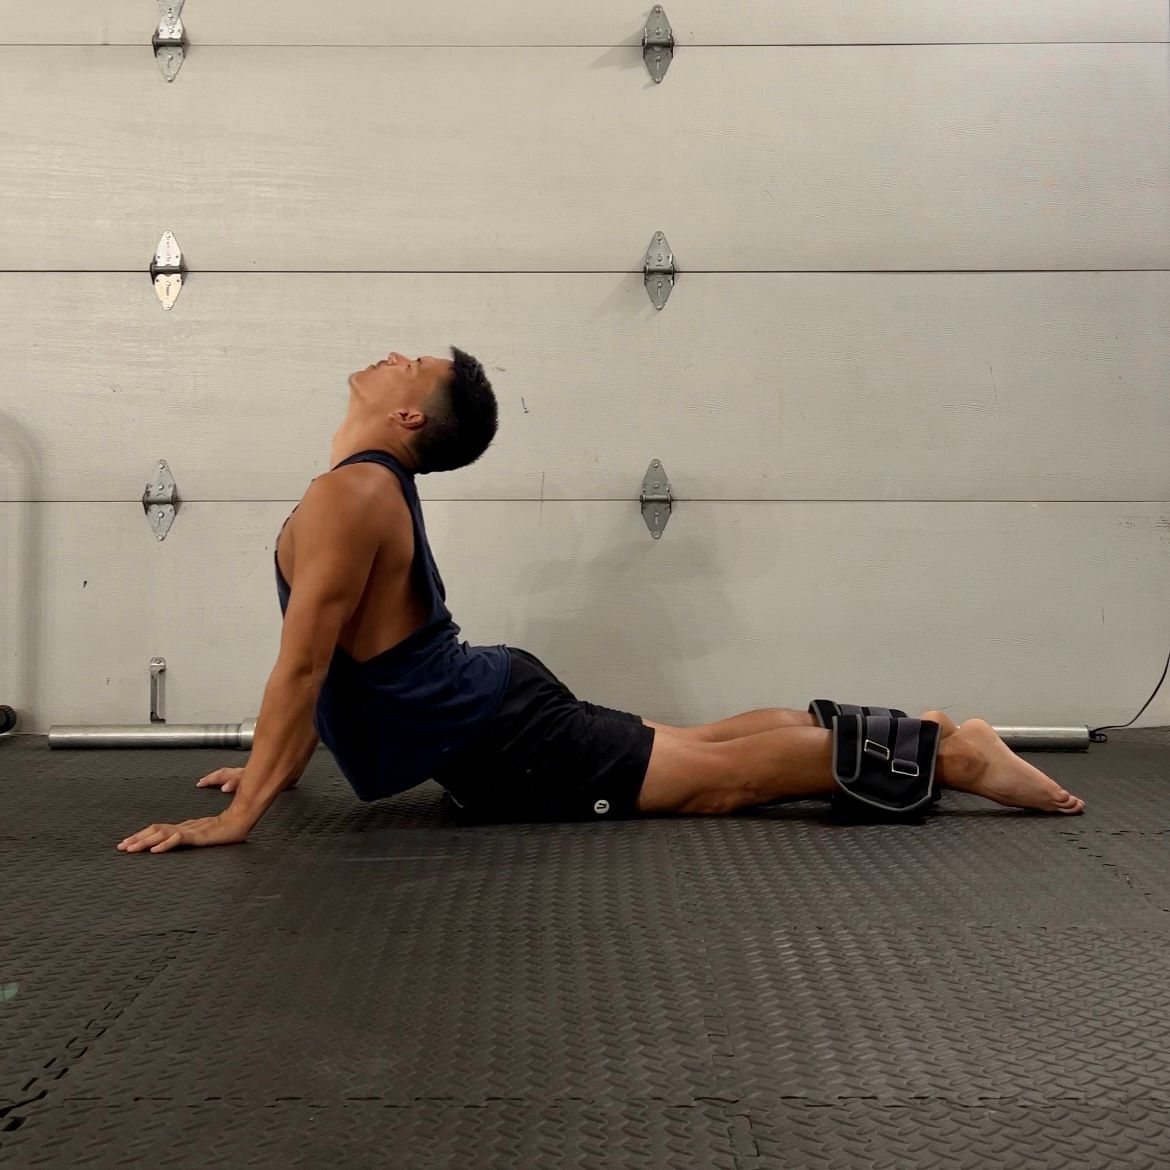
Once again, it's critical here for the hands to only provide assistance, NOT do all of the work. Do your best to have the intention of holding the positions by using the strength and contractions of your back muscles.
2) Reducing Hand Assist
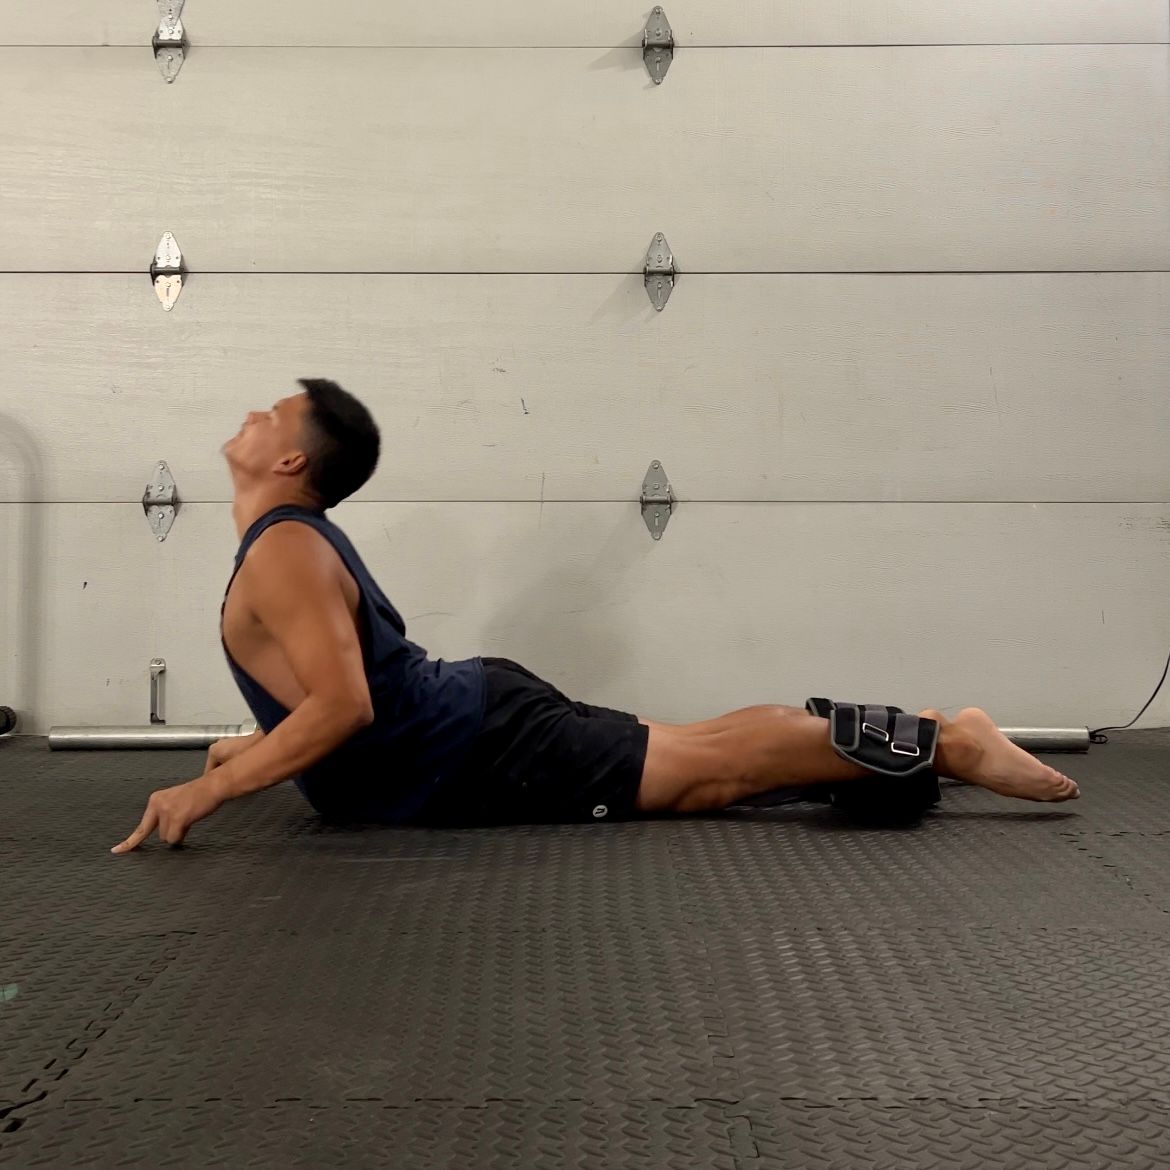
The second progression to the active cobra is reducing the amount of hand assistance until we can hold the cobra entirely actively without any additional assistance from the hands.
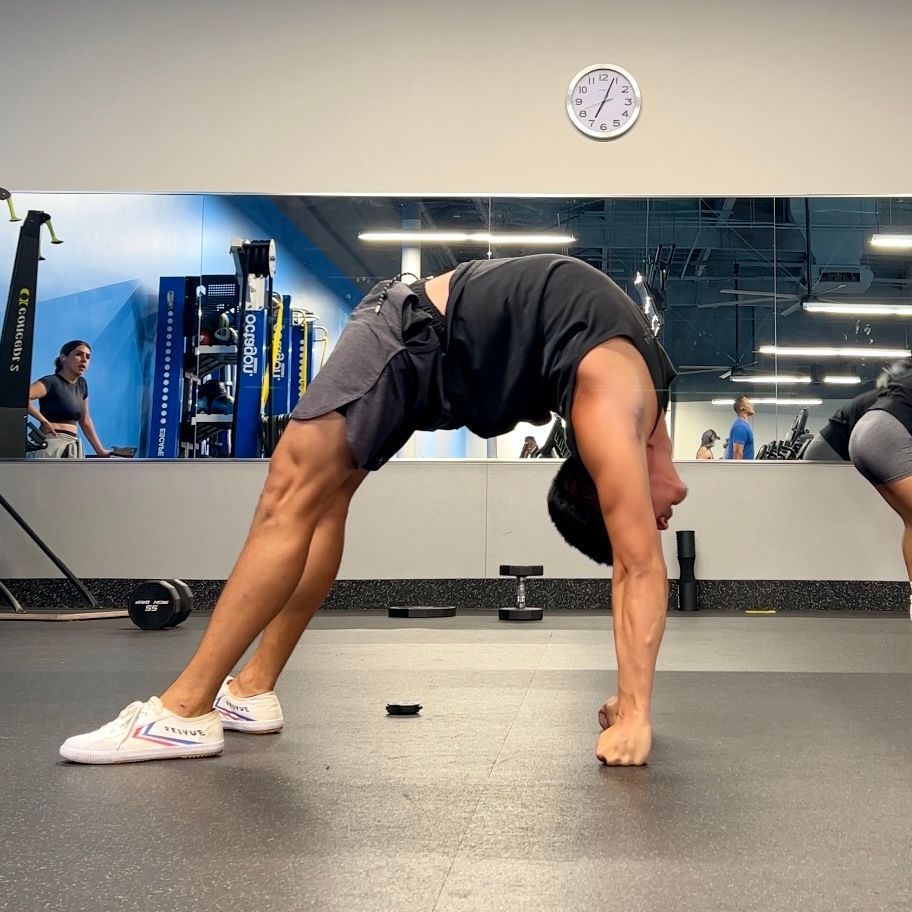
Keep in mind that there's quite a large difference in intensity when going from hand assist to no hand assist. Therefore, it's best to do this progressively over time. One way to do it is by moving from full-hand support to fingertip support. At first, start with all 5 fingers in contact with the ground in a tented position. Then over the course of the training cycle, work to reduce the number of fingers in contact with the ground until you reach one finger assist as shown in the picture below.
You're ready to fly from this point on. Send your arms out to the side or behind your back and try to hold the cobra without support from your arms. If you find that you fall forward as you first attempt this, it may be useful to elevate your hips on a rolled yoga mat or block. This setup will be covered in the advanced variations.
3) Advanced Variations
Once the hands are suspended in the air and you're able to hold your cobra actively using only the strength of your back, you've entered intermediate and advanced cobra territory. There's an entire world to explore from here and I will cover these progressions in a separate article.
Programming - 3 sets of 3-5 reps each with a 5-10s hold
Conclusion
When it comes to building superior back flexibility, the key is to work on both, learning how to extend and access the t-spine, as well as strengthening the back muscles to facilitate the extension of the spine. One idea presented in this article is to work both elements from the start of your backbend journey. The backbend over support will teach the body how to begin to move the vertebral segments of the thoracic spine and the active cobra will work to strengthen your active extension abilities. Each of these movements is a great choice for those new to backbends and bodies of all kinds but can also be modified and tailored to the most advanced practitioner.
If you enjoyed this article, I encourage you to subscribe to my weekly newsletter, The Sunday Spread, where I share free resources, training tips, discounts on my coaching services, student highlights, as well as my personal interests like podcasts, books, and worthwhile videos. You can sign up by hitting the button above!