Agonist/Antagonist Muscle Pairs In the Front and Side Splits
The purpose of this article is to explain the relationship between agonist and antagonist muscles in the body and how they relate to the front and side splits.
When it comes to adult flexibility, people often have immensely strong beliefs that they're either born flexy and bendy or born into a tin body incapable of change. More often than not, these beliefs are profound and held with conviction. And I don't blame folks for feeling this way. If you've always felt stiff and never been flexible in your entire life, how would it make sense that you could change that as an adult? If we've never had the experience of developing or improving our flexibility, we'll never believe it. This is just like imposter syndrome. All that's needed is a first-hand experience of your flexibility improving and all those thoughts about not being able to develop flexibility will vanish.
So how do we create those first-hand experiences as an adult? Well, let me tell you. For a majority of people, it's not going to happen by doing yoga and sitting in long-held passive stretches every day. While passive stretching does absolutely have its time and place in a proper flexibility training regime, on average, most people will have more success by utilizing static active and dynamic active movements. This simply refers to how our joints and muscles move in our body through our own will.
This article will explore how we use pairs of muscles and which muscle pairs are working in the front and side splits.
Definitions
Before we begin, let's define the two terms I used above. Static active flexibility and dynamic active flexibility. The simplest way to understand the terms is that static and dynamic refer to whether a joint is moving or not moving. And active just refers to a muscle that is contracting as opposed to relaxing.
One minimalistic view of flexibility training is that it's nothing more than educating the body on how to use its muscles to safely pull our joints into, and out of, our desired positions. Mechanically, joint movements occur through changing relationships between muscle lengths. The muscles that lengthen are referred to as antagonist muscles and the muscles that shorten are known as agonist muscles. Very simply, these terms refer to the thing that gets moved and the thing that moves something, respectively.
To illustrate the concept, let's take a look at the elbow joint. In order to bend the elbow, ie to flex the bicep or "show our guns", the bicep must contract and get shorter. It's the thing that moves. The tricep must do the opposite. It will relax and get longer. It's the thing that gets moved. If we wanted to do the reverse and straighten our elbow, the bicep has to relax and lengthen while the tricep contracts and shortens.
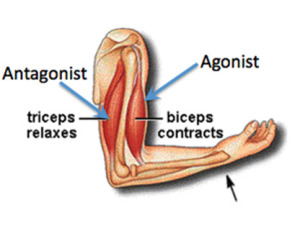
The agonist muscles are the muscles responsible for the moving of the joint, so they are referred to as the prime movers. Having knowledge of which muscles are the prime movers in our desired flexibility positions is an advantage that will allow us to properly improve our range of motion in the positions we want.
Every joint in the body moves in this fashion. Through muscles contracting and lengthening. And the secret to developing flexibility as an adult is to not only train our antagonist muscles to relax and lengthen but also train our agonist muscles to contract and shorten harder.
The secret to developing flexibility as an adult is to not only train our antagonist muscles to relax and lengthen but also train our agonist muscles to contract and shorten harder.
To further explore the concept, we'll dive into the muscle pairs and prime movers of the front and side splits, as well as provide an exercise for each of the prime movers that you can take action on and begin training immediately.
Front Split
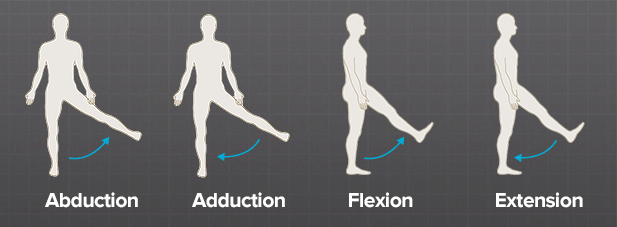
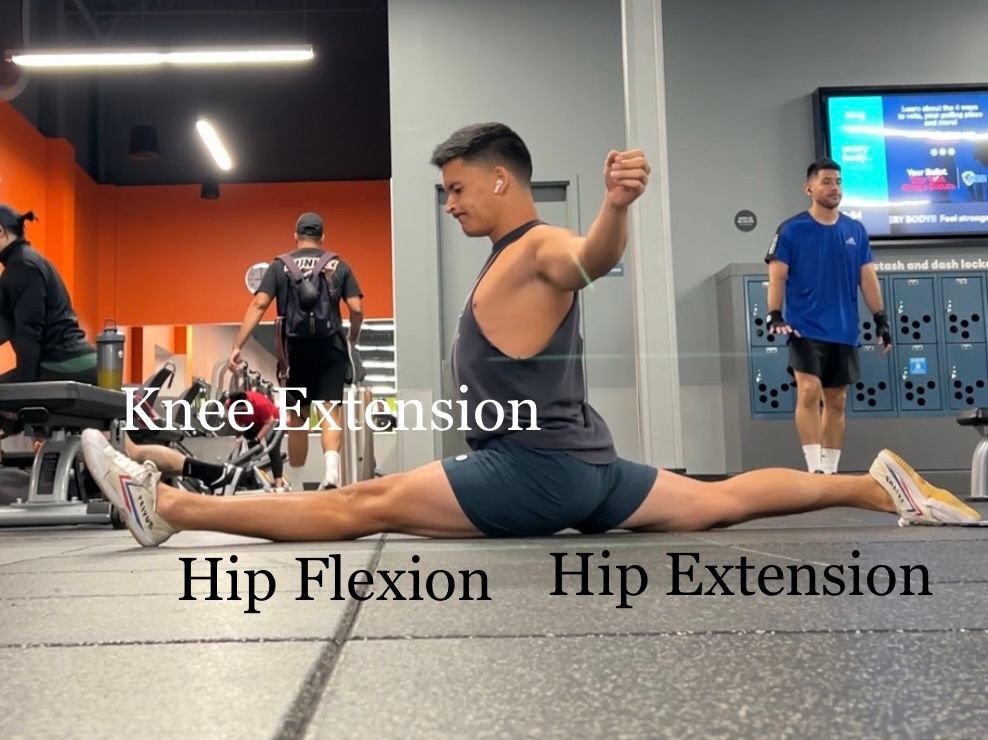
When it comes to the front splits, there are three important joint actions taking place. One at each hip joint and one at the knee. The leg in front of the body is undergoing hip flexion and knee extension and the leg behind the body is undergoing hip extension.
Hip Flexion
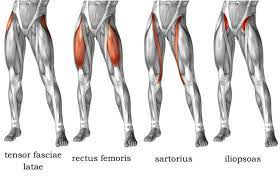
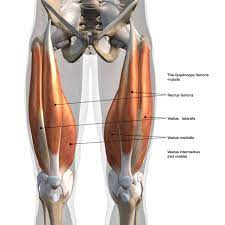
Hip flexion refers to moving the leg in front of the body. The primary movers of hip flexion are the 4 hip flexors shown in the image below. That means that these are the muscles that will be shortening and actively moving our leg in front of the body. The agonist muscles.
Training Hip Flexion
As I eluded to in the quote above, the secret to developing flexibility is training our agonist muscles to contract harder. It's common for people to train the lengthening side of the joint and neglect the shortening side.
Since the hip flexors are the primary movers of hip flexion, we want to find an exercise that would target the strength of our hip flexors. We're looking for raw hip flexor power!
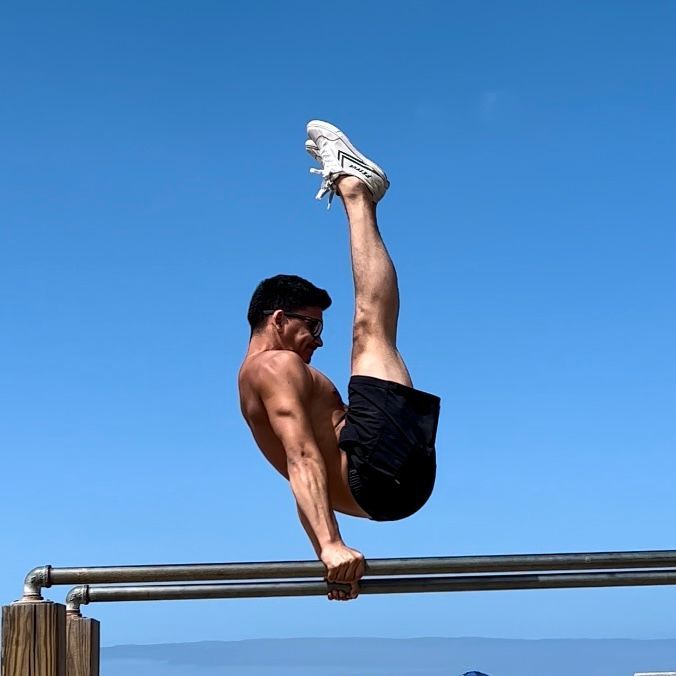
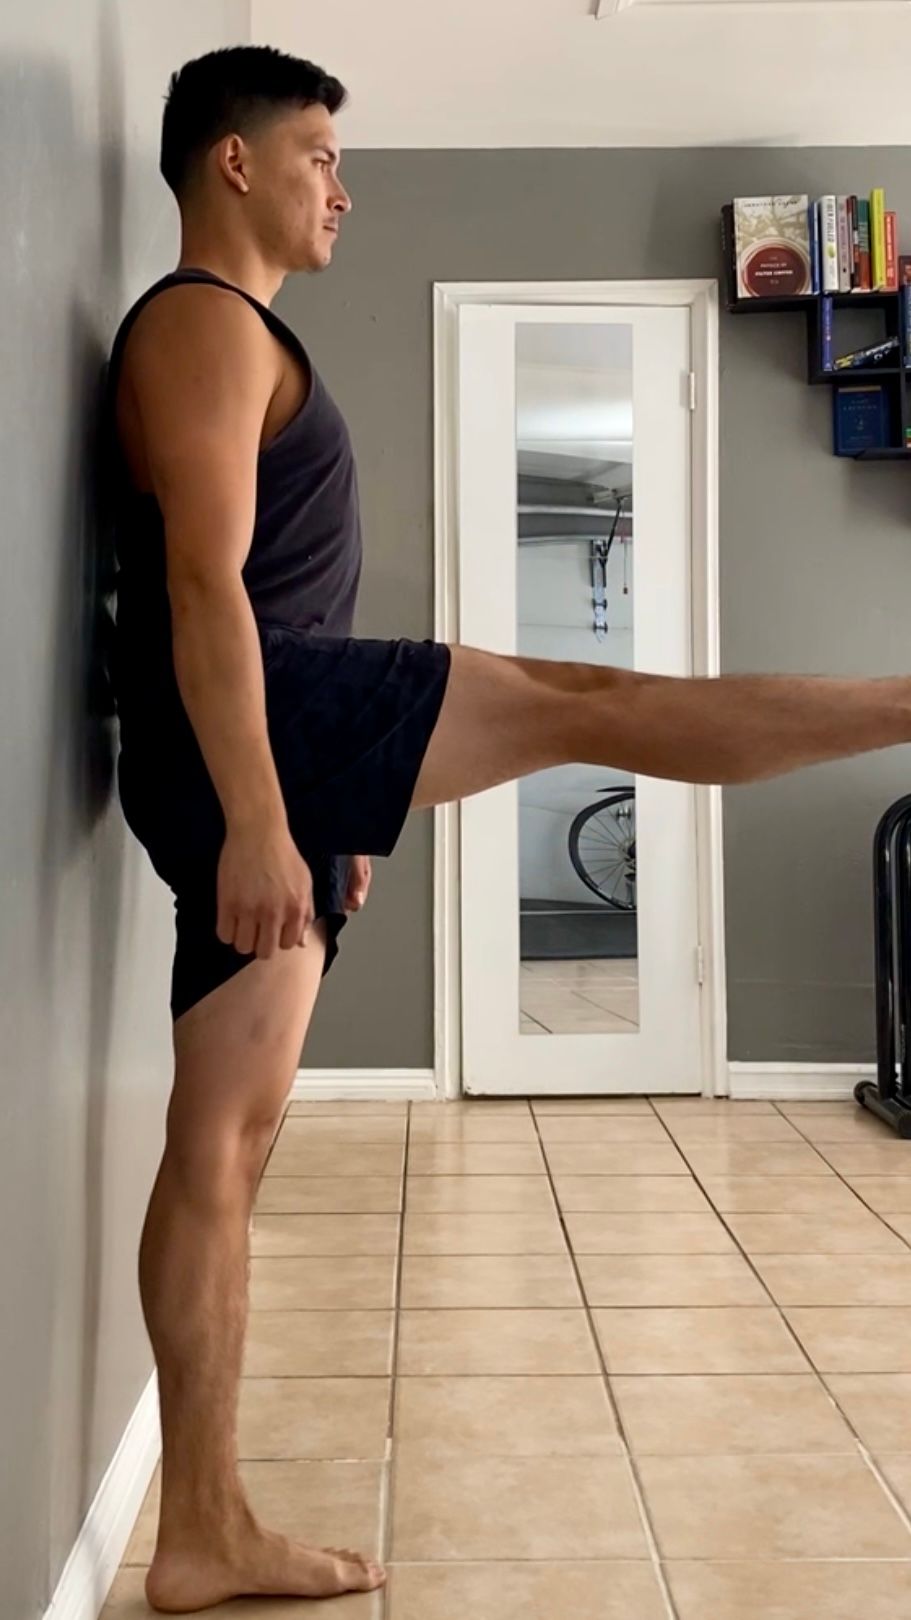
One idea is to train the standing leg lift. It's an active flexibility exercise that does wonders for strengthening the hip flexors.
3 sets of 10r + 10s hold holding each rep for 2-3s
Knee Extension
The hamstring and quadricep muscles are the pair that work together to move the knee joint. When we extend/straighten our knee in the front split, the quads act as the prime movers. The agonist muscles are shortening in order to straighten the knee. The quad muscles involved are shown in the image below.
In the front split, it's easy to see that the front leg needs considerable hamstring flexibility. There are hundreds of exercises that are effective at training the hamstrings to lengthen. Like touching your toes or performing a Jefferson curl for example. But what I'm trying to get across in this article is that we need to train the primary movers as these are the muscles that are responsible for getting us into the position. So we need not only to train the length of our hamstrings but also the contracting power of our quads.
Training Knee Extension
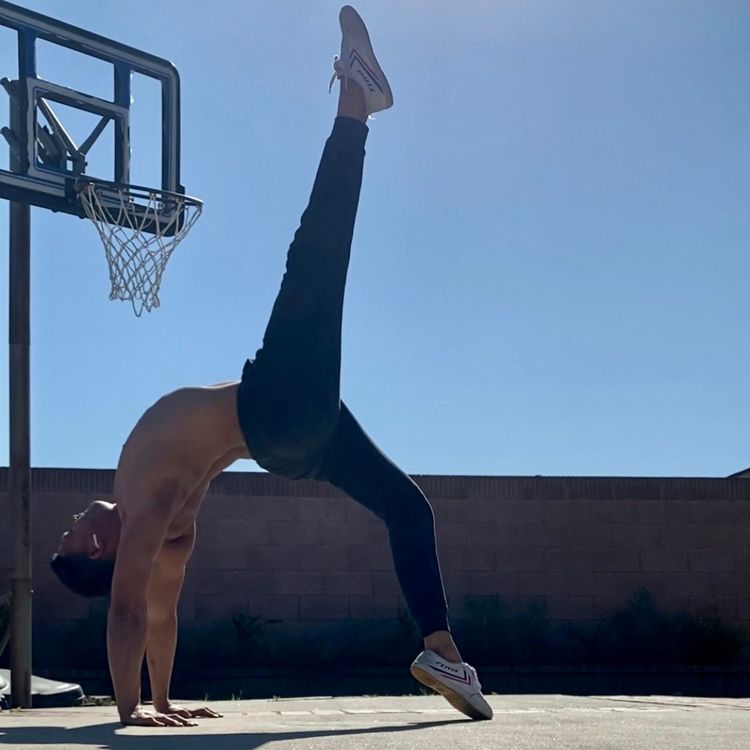
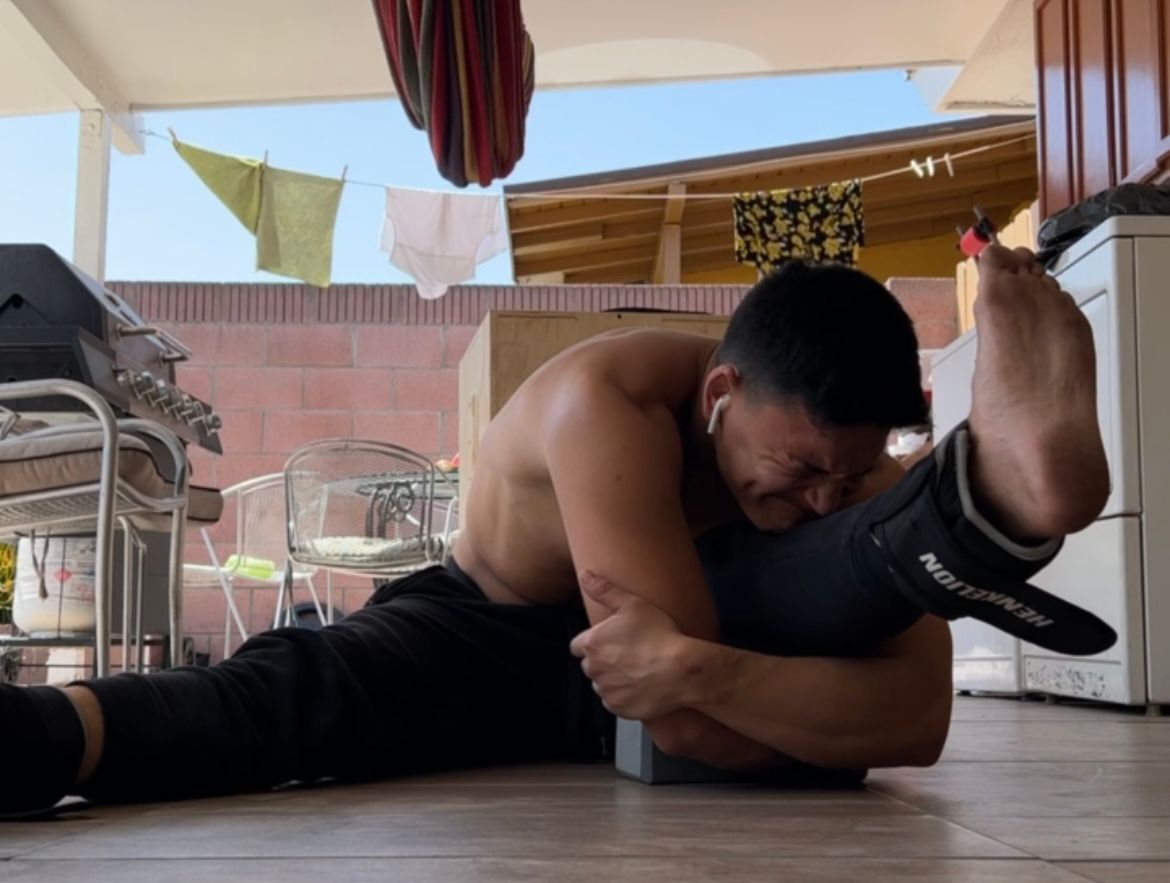
Without a doubt, my favorite way to train knee extension is using a plethora of different knee extension variations where we're also in deep hip flexion. We covered hip flexion above. All I mean by "deep hip flexion" is hip flexion where our hip flexors are at their shortest ranges. In other words, a compressed hip.
Learning how to contract our quads while our hip flexors are shortened is no easy feat. Train them in all their flavors. Seated, supine, standing, loaded, ankle flexed, ankle pointed, and so on! They're that good. But one place to start is with seated knee extensions with the leg over a block and without ankle weights. They can be trained for 3 sets of 8 reps each with a 3s hold.
Hip Extension
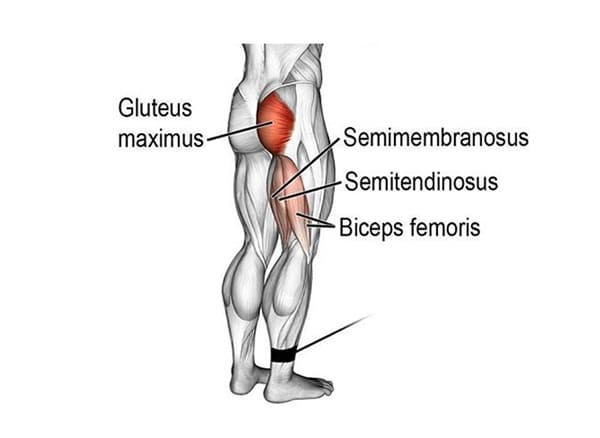
Hip extension can easily be thought of as the opposite of hip flexion. It occurs when we move our legs behind our bodies. In the front splits, it's the back leg portion of the movement. The primary movers of hip extension are the glute max and the hamstring muscles. Each is shown in the image below.
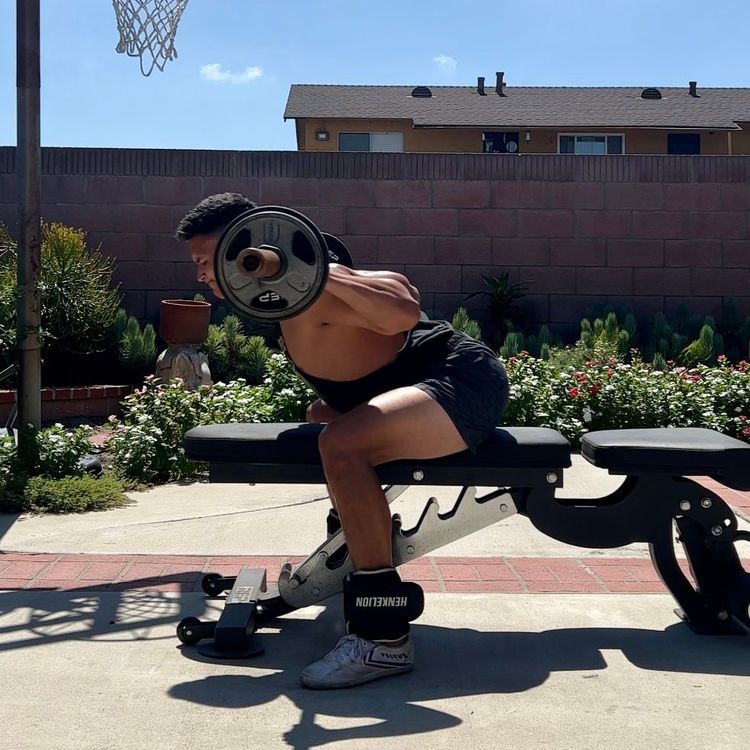
Training Hip Extension
Just like each of the previous joint actions we discussed, there are also a variety of ways that hip extension can be trained. From beginner to advanced. And I find hip extension to be slightly more challenging to train effectively than hip flexion and knee extension. One hip extension variation that is simple and great for teaching the technique is the Prone Hip Extension isometric. It's a simple movement. The most important form cue is a strong posterior pelvic tilt. Contract your glute and hamstrings hard throughout the movement. Actually, contract your glute and hamstring so hard that either one of them cramps! They can be trained for 3 sets of 20-30s holds.
Side Splits
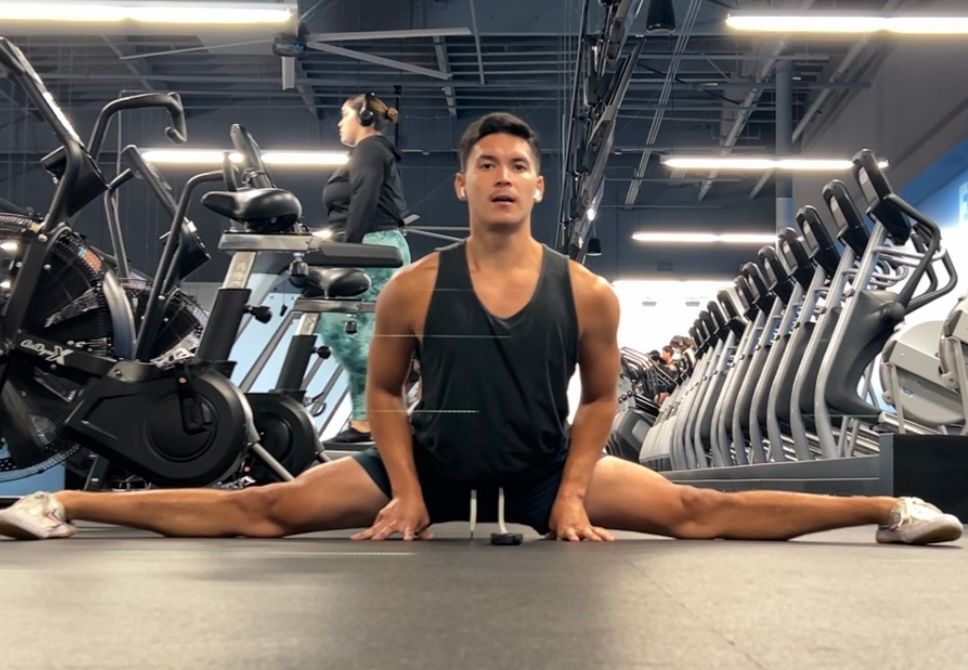
When it comes to the side splits, there is only one primary joint action taking place. Abduction of the hip. Excuse the face, no idea what happened 😂.
Hip Abduction
Hip abduction refers to moving the legs away from the midline in the body. Stepping to the side and getting out of bed are both examples of hip abduction that are used in daily life. In this case, it's not the glute max that is the prime mover, it's the glute medius, minimus, and tensor fascia latae.
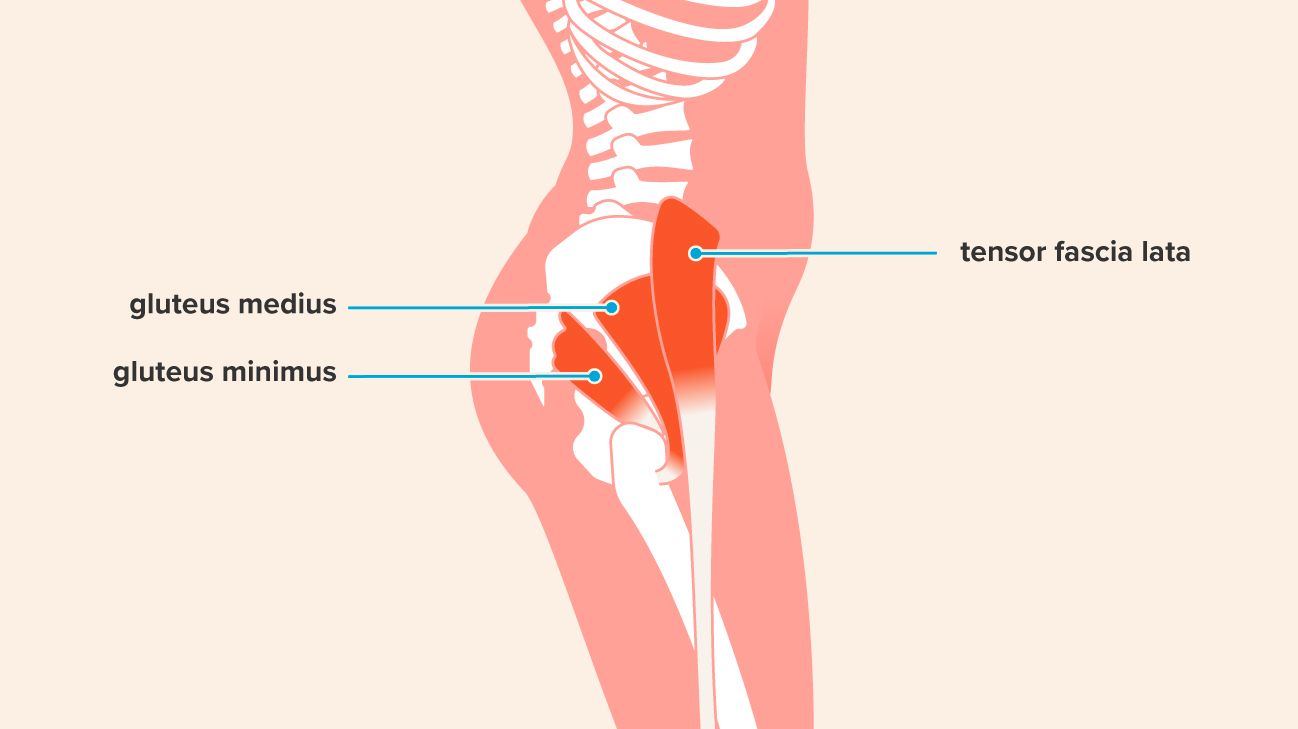
You can see from the image above that these three muscles are oriented laterally on the hip as opposed to the posterior side of the hip like the glute max. This is important to keep in mind. As you're performing the hip abduction movements, you're going to want to look for a sensation in this area of the hip.
Training Hip Abduction
One of the simplest ways to begin tackling hip abduction is to use variations of the Pissing Dog. There are countless varieties that can be trained and alternated between training cycles. The variation that I demonstrate in the video linked above is a straight leg variation performed for reps with a hold at the end. I like to train it using 3 sets of 10r + 10s hold.
Conclusion
When it comes to training the front and side splits, I think it's a worthwhile endeavor to spend time learning and understanding what is happening in the body for the movement to emerge. It doesn't need to be a deep understanding, but a basic knowledge of the mechanics is essential to unlocking the skills. The 3 main points about the mechanics of each of the splits covered in this article are the primary joint actions, the agonist/antagonist muscle pairs, and an exercise that will actively strengthen the primary movers.
If you enjoyed this article, I encourage you to subscribe to my weekly newsletter, The Sunday Spread, where I share free resources, training tips, discounts on my coaching services, student highlights, as well as my personal interests like podcasts, books, and worthwhile videos. You can sign up by hitting the button below!